I have now completed my lines of topology in Photoshop and transferred them into 3ds Max 2010 using Planes and Materials. They have now been organised and arranged as Reference Planes so that I am able to move onto the next step, which is actually making the Head. I have been dreading this part of the task up until now because I fear it could go horribly wrong but I can always restart it if needed.
I started off by watching the tutorial video for how to actually make the face of the model. The man told us to go over our lines of topology using the “spline” tool and create polygons. The next step would be to turn them into polygons and weld them all together. I watched the video of him doing this and even though he was quite experienced, it still took him a lot of time. I started to think about what I was going to achieve from this task, which was a number of polygons that formed the shape of the head with the edges and vertices outlining the topology lines that I had already drawn.
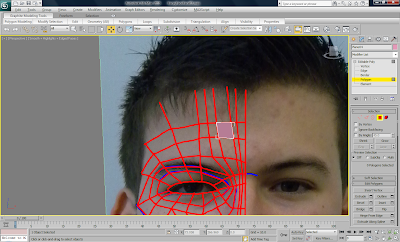
I decided that I would go with my instinct and after seeing other members of the class doing it, I felt a lot more confident in it. I decided that I would start off by creating a Polygon over one of the forehead lines. I then used the “Edge” tool and held “Shift” and moved it out. After welding the vertices in the correct place, I now had 2 Polygons. I continued this method on throughout the forehead and decided that it was definitely the easier method. I increased the amount of edges I moved each time and used the “Move” tool to place the vertices in the correct places.
I continued doing this until I had covered all of my Topology Lines. I was very careful to check that all of the polygons were still quads and that I had not made any silly errors or missed an occurrence of them being triangles or pentagons.
I started off with the single Polygon

I used Shift + Move Tool to start working on the Forehead.
I continued on down the face leaving the eye clear to fill in at a later point
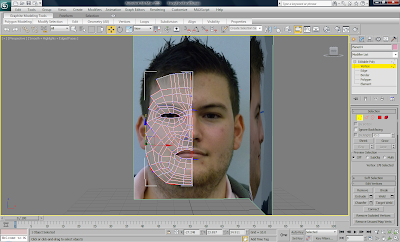
The completed face with all the Polygons made.
The completed face in Transparent view

Whilst using this method I came across 2 parts of the face that caused me to spend some extra time working on them. I knew that this would happen in a few areas after watching the person on the tutorial coming across the small problems to.
One key thing to make sure of was keeping all of the Polygon's to be quads. This became a bit of an issue with the nose because of the shape of a nose is quite curved. The lines of topology worked out a way for the nose to be split up into quad polygons however in practise, some of the vertices would be needed to created the shape of the nose.
To get round this problem I added another line of topology going from the forehead down to the top of the mouth and over the nose. This gave me some extra vertices/polygons/edges to work with when it came to modelling the head. I had to create a line going the whole distance to ensure the flow of topology would work when it came to adding a turbosmooth modifier.
The Nose
The second problem occurred when I started to model the mouth. Because a person's lips are rounded, I had a problem when it came to the corner of the mouth. On my original topology lines, I had created a polygon that looked to be a quad but when it came to actually making the polygons, it turned out to be a 5 sided shape. This meant that I needed to cut the shape so that it was turned into a quad whilst also keeping the complexity of the other polygon edges.
To do this I selected all of the polygons just under the corner and cut them. This gave me an extra line of topology to work with and was able to continue it straight between the chin and corner of the mouth. This is the white line in the image below.
The Mouth


No comments:
Post a Comment