Wednesday, 20 October 2010

Week 3 - Creating The Neck

I was quite disappointed by the lack of help the tutorial gave with working on the neck. In the tutorial it suddenly skips from having no neck at all to suddenly having an Adam’s Apple and a Collarbone. I was a bit unsure of how I was going to model the neck so I decided to just do the top of the neck rather than extending on to the collarbone and shoulders.

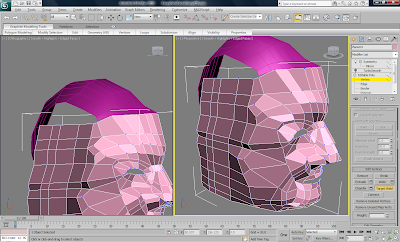
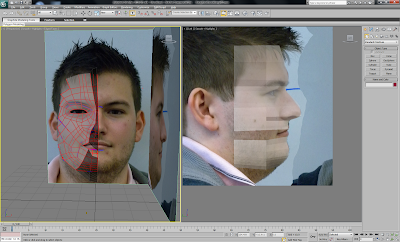
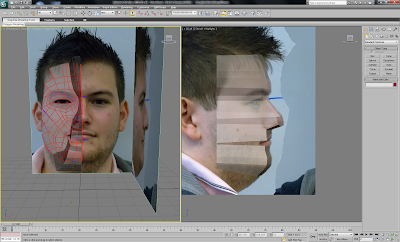
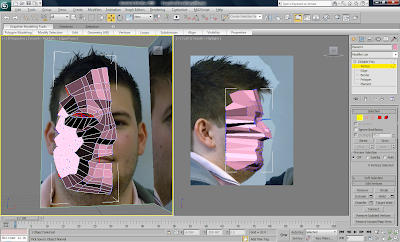
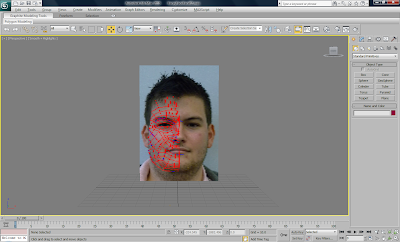
I created the neck by starting off with the back of the head and using the Shift + Move tool, I created extra polygons along the back of the head. I continued to do this to match up with the amount of Polygons on the two sides of the head. This meant that they would meet up and would allow me to weld the vertices together to create the roundness of the head.

I continued the moving and creation of Polygons round the sides and front of the head model to create the rest of the neck. I then added the neck and back of the head to the main face model to create one complete object. I moved some of the vertices to create a better rounded shape for the head and neck.

EDIT: After creating the rest of the head and starting to texture it, I had a look at the whole head to see what parts worked well and what didn’t and I felt that the neck was not looking correct. As I had modelled the shoulders the way I had, unfortunately the shoulders came out from the bottom of the head whereas in real life and my images, the shoulders come out from the bottom of a person’s neck. This is why I decided to change the neck to not incorporate the shoulders and just focus on the neck and correct shape.

I started off by removing the shoulder parts that connected to the neck.


I then deleted the shoulders and fixed the neck by extruding the polygons to make new ones and weld the vertices to join them together.


Week 3 - Creating The Rest Of The Head

I followed the tutorials that we were given to create the rest of the head. This would be done separate to the face and would then attach the two separate objects together after it had been completed.

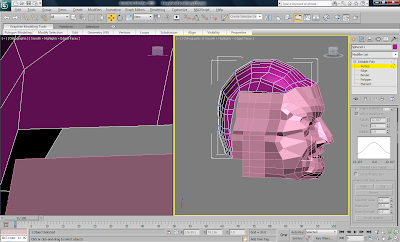
To do this, I created a Sphere object and converted it to an Editable Poly. I increased the amount of Segments in the Sphere so that it would match up to the top of my head. Once I had done this, I highlighted the bottom right third of the sphere as this would not be needed. I also deleted a lot off the side of the sphere along with some extra at the front and back to just make the shape of the actual head itself correct.

I moved the vertices around that were closest to the top of the forehead. I moved them closer to the other vertices so that it would make it a lot easier when it came to welding them together and attaching the object.

I started to extrude Polygons from the side of the head to create the side of the head and join up with the rest of the sphere. I used the Shift + Move tool to create the new polygons and therefore create a good flow of topology.

I started with the Sphere and took off the sides.

I then moved the vertices to be able to join the forehead and started working on the polygons for the side of the head.


I started to weld some of the Polygons to the rest of the head.


Friday, 15 October 2010

Week 2.cont - Giving The Face Some Shape

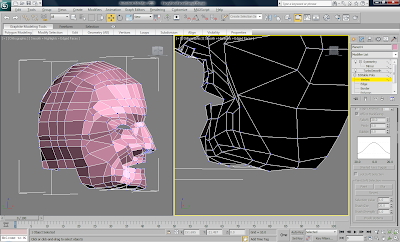
I now have a flat surface of Polygons joined together in the shape of the face but obviously a human's face is not flat. I watched the next 2 tutorials that showed how the depth of the face was going to be achieved. The main method for doing this was to use the Side Reference Plane to move the Vertices outwards and line up with the edge of the face.

The best way to do this was to take the closest line of Vertices to the centre of the face and start by moving them out. I was then able to line up a second line of Vertices parallel to the front line. This would give the affect of the head starting to round off. For the key features of the face, such as the eye and nose, I used my 2 Reference Planes to line them up.

I started by moving the middle Vertices out


I started to shape these vertices to line up with the edge of the head


I continued throughout the face
Face modelled without turbosmooth on

Complete face with turbosmooth on.
I then added a "Symmetry" modifier to the face.

Creating the key features of the face was probably the hardest because it was very important that they lined up correctly as they would be the first thing that a person would look at when viewing the model.

I used the method given by the tutorial for most of this task however I had to spend a lot of time moving individual Vertices whilst viewing them in the "front" and "side" viewports. A lot of the modelling was going to be done eyesight so that they could be moved until they looked correct.

I had quite a distinctive seam down the middle of the head. To eliminate this I played about with the Symmetry and Mirror tools to make the join more realistic. I had to edit a few of the vertices to also make it look better.

Thursday, 14 October 2010

Week 2.cont - Building the Face

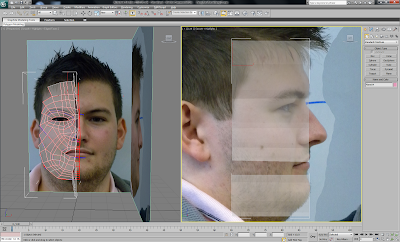
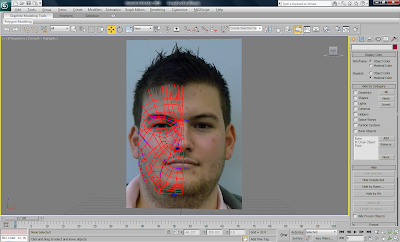
I have now completed my lines of topology in Photoshop and transferred them into 3ds Max 2010 using Planes and Materials. They have now been organised and arranged as Reference Planes so that I am able to move onto the next step, which is actually making the Head. I have been dreading this part of the task up until now because I fear it could go horribly wrong but I can always restart it if needed.

I started off by watching the tutorial video for how to actually make the face of the model. The man told us to go over our lines of topology using the “spline” tool and create polygons. The next step would be to turn them into polygons and weld them all together. I watched the video of him doing this and even though he was quite experienced, it still took him a lot of time. I started to think about what I was going to achieve from this task, which was a number of polygons that formed the shape of the head with the edges and vertices outlining the topology lines that I had already drawn.

I decided that I would go with my instinct and after seeing other members of the class doing it, I felt a lot more confident in it. I decided that I would start off by creating a Polygon over one of the forehead lines. I then used the “Edge” tool and held “Shift” and moved it out. After welding the vertices in the correct place, I now had 2 Polygons. I continued this method on throughout the forehead and decided that it was definitely the easier method. I increased the amount of edges I moved each time and used the “Move” tool to place the vertices in the correct places.

I continued doing this until I had covered all of my Topology Lines. I was very careful to check that all of the polygons were still quads and that I had not made any silly errors or missed an occurrence of them being triangles or pentagons.

I started off with the single Polygon
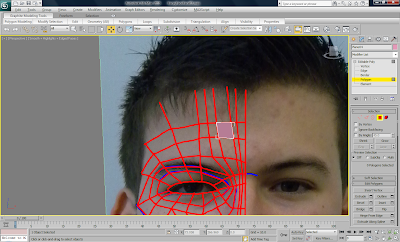
I used Shift + Move Tool to start working on the Forehead.

I continued on down the face leaving the eye clear to fill in at a later point

The completed face with all the Polygons made.

The completed face in Transparent view
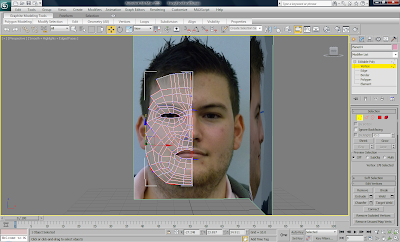

Whilst using this method I came across 2 parts of the face that caused me to spend some extra time working on them. I knew that this would happen in a few areas after watching the person on the tutorial coming across the small problems to.

One key thing to make sure of was keeping all of the Polygon's to be quads. This became a bit of an issue with the nose because of the shape of a nose is quite curved. The lines of topology worked out a way for the nose to be split up into quad polygons however in practise, some of the vertices would be needed to created the shape of the nose.

To get round this problem I added another line of topology going from the forehead down to the top of the mouth and over the nose. This gave me some extra vertices/polygons/edges to work with when it came to modelling the head. I had to create a line going the whole distance to ensure the flow of topology would work when it came to adding a turbosmooth modifier.

The Nose


The second problem occurred when I started to model the mouth. Because a person's lips are rounded, I had a problem when it came to the corner of the mouth. On my original topology lines, I had created a polygon that looked to be a quad but when it came to actually making the polygons, it turned out to be a 5 sided shape. This meant that I needed to cut the shape so that it was turned into a quad whilst also keeping the complexity of the other polygon edges.

To do this I selected all of the polygons just under the corner and cut them. This gave me an extra line of topology to work with and was able to continue it straight between the chin and corner of the mouth. This is the white line in the image below.

The Mouth


Week 2.cont - Reference Planes

I now had the Topology mapped out for my head. The next step was to take the files that I had created in Photoshop and put them into 3DS Max2010 , which is where I would actually be modelling the head. I used the tutorial to do this however I already had quite a good idea of how this part of the task was going to be done from the skills I had learnt in years 1 and 2.

The images with the lines of Topology would be used as Reference Planes to allow me to build the shape of the head. To start with I created a simple plane in 3ds Max. I then opened up the materials menu using the hotkey “m”. I then went to diffuse and selected to look at more options, which I then selected Bitmap. This would allow me to put an image of mine onto the Plane as if it were painted onto it like a poster.

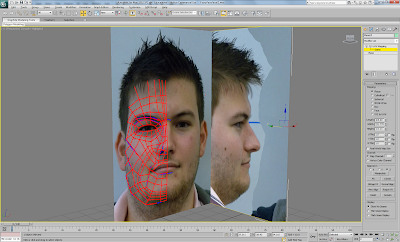
After using the gizmo tool that I had used in previous years, I moved it so that the image was in full view of the plane. This meant editing the size of the plane but this was not an issue. A key thing to note was that although you can only see the forward look of the head, the side view is also there but due to the size of the plane it is hidden. This is good because we would then use a separate plane to add the side view.

You may notice that the lines of Topology seem very distorted and unable to see. This would cause a problem as it would make it impossible to work from. After speaking to people in the class and the lecturer, we found that this was a small issue that 3DS Max 2010 has when trying to add High Quality Images from Photoshop as Materials. The simple method to get round this is shown in the tutorials and would allow me to restore to the intended image.

I now needed to create the Reference Plane for the side view. To do this I created an instance of the plane that I already had. I then used the gizmo to move the material image so that the side view of the face was now clear to see. I then used the Move tool on the plane to place it correctly so that I would be able to work from it.

I now have my Reference Planes ready to work from and start the actual modelling of the Head.

Wednesday, 13 October 2010

Week 2 - Face Topology

Week 2 started off with our weekly lecture with Jo Bowman. She went through our blogs and discussed what stages we were up to with our individual head models. We also discussed as groups the task that we had ahead for the Visit Essex project.

I downloaded and viewed the next couple of tutorials for the head model. I looked at what the next tasks were whilst also looking ahead over the next couple of videos so I had a good idea of what to expect and also what I would be hoping to achieve. The first thing I needed to do was work on the Topology of the face. This would be done by taking the images that I had already taken and aligned and drawing on them in Photoshop. I would be drawing lines of Topology, which pretty much is the individual lines that make up a human head. These lines would be used to create the face,

The first step was to look at the key parts of the face that would have an effect when creating the head model. Examples of this would be Wrinkles, Nostrils, Eye Shadows and any other possible indents on the face. As suggested by the tutorial, I drew these lines in blue and would ten continue to draw the other lines of Topology in red. This would allow me to distinguish where the key parts of the face were and to ensure that I took them into consideration for later.

I then used the Blue Topology lines that I had created as guidelines for the drawing of the rest of the Topology of my face. This was definitely the hardest test I had so far and after speaking to many classmates, it seems that this was the case for a lot of people. It was difficult because the first thing I was trying to do was to create a flow of lines through the face. I was also ensuring that I took all the key features of the face into consideration. This made parts of the face such as the nose, eyes and mouth tough to work on.

The toughest part of this task was ensuring that all of the lines would only create quads. This is very important because Quads create the best flow of topology whereas 3 or 5 sided shapes create issues by vertices pinching and not smoothing properly. This caused me to have to attempt these topology lines a number of times to ensure that only quads would be created.


Week 1 cont. - Lining Up The Images

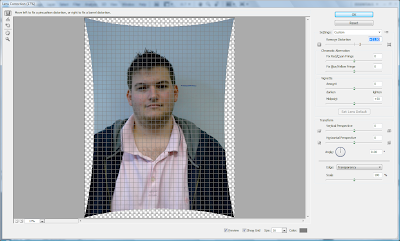
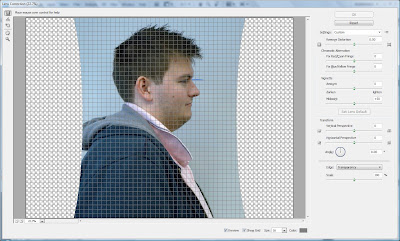
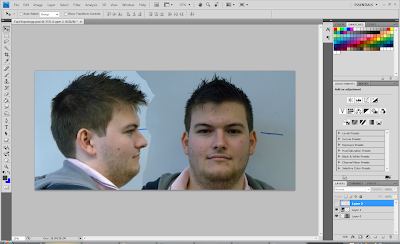
The next step was to take my 2 images and align them together. Using the tutorials, the first step was going to be to eliminate some of the distortion in the pictures. This can be caused by the lack of quality in the camera, movement in the camera when the picture was taken or many other reasons. Photoshop allows this to be done very simply. By using the Lens Distortion tool, it allowed me to give some extra detail to the picture to eliminate any distortion that was caused from the camera. The big problem with doing this is that it would be re-sizing my images and therefore I would need to be certain that the images are re-aligned together and the same size.

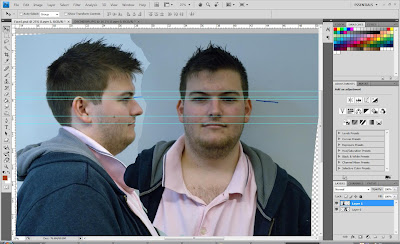
After I had eliminated some of the lens distortion from both images, I then needed to ensure that they lined up with each other. This would be crucial when it came to actually building the head as these images would be used as reference planes to build from. I moved both images onto 1 layer on Photoshop and erased some of the unnecessary background.

The next step was to make sure that the pictures lined up. The easiest and most effective way of doing this in Photoshop was to use the rulers provided. This would allow me to pick out key parts of the face and ensure that they were lined up. This took some time to do and I noticed it was quite tough for all the people in my class mainly because when you got 1 key feature lined up, such as the eyes, it meant the others were not lined up. It took some rotating, moving and transforming in Photoshop to get them aligned as much as possible.